The mxgui tools is a set of utilities to help in developing embedded user interfaces. They are released under the GPL, with no linking exception as opposed to the mxgui library since they are standalone applications and not libraries.
Requirements
The mxgui tools are designed to be run from a Linux desktop, Windows is not currently supported as the bash shell is sometimes required. They depend on CMake for the build system, and the boost libraries. The mxgui simulator also requires the Qt libraries (development version) as they are used to open a window on screen.
Code generators
The code generators are a set of three command line applications, namely pngconverter, fontrendering and resourcefs which are used to generate source code or binary files. They can be found in the mxgui/tools/code_generators directory.
To build them, open a shell in the mxgui/tools/code_generators/build directory and type
cmake ..
make
As a result you will find the binaries in the same directory.
pngconverter
Pngconverter is likely to be the most used tool, its purpose is to convert a png image in a set of a .cpp and a .h file with a static instance of the Image class, usable to draw an image on screen.
When run with the --help parameter it prints this:
./pngconverter --help
PngConverter utility v1.21
Designed by TFT : Terraneo Federico Technologies
Options:
  --help                Prints this.
  --in arg              Input png file (required)
  --depth arg           Color depth, 1,8,16,18 or 24 bits (required)
  --out arg             Output png file for validation
  --binary              Generate a binary file instead of a .cpp/.h file
To use it, assume you have an image called test.png that needs to be embedded into a firmware at a 16 bit per pixel color depth, the command line to do so is
./pngconverter --in test.png --depth 16
As a result, the program will produce, in the same directory where the test.png file is, two files: test.cpp and test.h In particular, the file test.h will contain the following line of code:
extern const mxgui::Image test;
This is the instance of the Image class that can be used to draw the image.
To actually draw the image on screen, it is required to perform the following steps: first, the file test.cpp should be added to the makefile (if compiling for Miosix), or the qtsimulator's CMakeLists.txt (if using the simulator), then, a simple main program that prints the image is this:
#include "mxgui/entry.h"
#include "mxgui/display.h"
#include "test.h" //Header file of the image to draw

using namespace mxgui;

ENTRY()
{
    {
        DrawingContext dc(Display::instance());
        dc.drawImage(Point(0,0),test);
    }
    for(;;) ;
}
It should be noted that the name of the Image class instance is the same as the png file name. Therefore the png file name should be a valid C++ variable identifier, thetis, it should not contain spaces or begin with a number.
fontrendering
This tool is used to convert a TTF or BDF font file into a set of lookup tables, contained in an header file, usable to print text using that font.
You will not likely use this tool directly, as mxgui has a set of predefined fonts available by including mxgui/misc_inst.h. Note that, for code size reasons, you may need to enable support for those fonts in mxgui_settings.h. For example, bold fonts are disabled by default, if you need them uncomment MXGUI_ENABLE_BOLD_FONTS in mxgui_settings.h
However, if you have a specific font you want to use, you can convert it using fontrendering.
Have a look at the mxgui/tools/code_generators/convert.sh script to see how to use fontrendering, or type
./fontrendering --help
resourcefs
resourcefs is a tool designed to address the need to store large amounts of images even on microcontroller with little flash memory, for which the pngconverter+embedding approach isn't suitable.
The idea is simple, preprocess the images as usual using pngconverter, but this time generate binary files instead of source files, group those files in a readonly filesystem and store it inside an external flash memory, most likely one with an SPI interface.
To use resourcefs, consider you have a directory named images_in full of png images, and you want to make a filesystem with it. This script will do this:
#!/bin/bash

export PATH=$PATH:<path where pngconverter and resourcefs are located>

rm -rf resource
cp -R images_in resource
cd resource
for i in `ls`; do
    pngconverter --in=$i --depth 16 --binary
done
rm *.png
cd ..
resourcefs --in resource --out resource.fs
Keep in mind that resourcefs currently does not support subdirectories.
Then you need to flash the genearted resource.fs onto the flash memory on your device, and write the code to allow mxgui to read from it. An example of how to do so is available in mxgui/drivers/resfs_mp3v2.h and mxgui/drivers/resfs_mp3v2.cpp. Basically, you need to implement two functions, backendInit() and backendRead().
At this point you can draw an image by using the ResourceImage class. Assuming that the filesystem contains an image named test, the code to draw it is this:
#include "mxgui/entry.h"
#include "mxgui/display.h"
#include "mxgui/resource_image.h"

using namespace mxgui;

ENTRY()
{
    {
        DrawingContext dc(Display::instance());
        ResourceImage image("test");
        dc.drawImage(Point(0,0),image);
    }
    for(;;) ;
Note that when using the mxgui simulator the ResourceImage class works by searching images inside a "resource" directory that must be present in the same directory where the qtsimulator binary is.
Mxgui simulator
The Mxgui simulator, also called qtsimulator is a Qt gui application that open a window of the size of the embedded display, and allows to debug the visual aspect of an mxgui application without using the embedded device. It is pixel perfect in the sense that Qt is only used to provide a window, all the font, image and line drawing algorithms used for the simulator are the same as the ones that will be used when the code in run in the embedded system.
On the other hand, qtsimulator does only map mxgui calls into a virtual framebuffer in Qt, it does not simulate the whole Miosix kernel, nor it is a binary virtual machine that executes ARM code on x86 CPUs. This means that it does not simulate the cpu and memory limitations of the embedded system, nor its peripherals. This means that it cannot be used to profile the embedded code as when run on the embedded system it will run slower due to the lower power processor, and also it does not help in debugging memory issues. For instance, allocating an 1MB data structure will succeed in the simulator, but will fail on the embedded system (unless it has more than 1MB of RAM...)
The simulator is in the mxgui/tools/qtsimulator. To compile it, as usual, open a shell in the mxgui/tools/qtsimulator/build folder and type
cmake ..
make
But before you might want to edit the FOO_SRCS in the CMakeLists.txt file to add your sorce files. In fact, the simulator and the Miosix kernel use two different build systems, CMake for the simulator and plain makefiles for Miosix. This means that if you add a source file to your project, you need to remember to add it to both the Makefile in the top level directory (for Miosix) and to the CMakeLists.txt on mxgui/tools/qtsimulator (for the simulator).
The simulator compiles into a binary in the build folder. You can launch it by simply double-clicking the file.
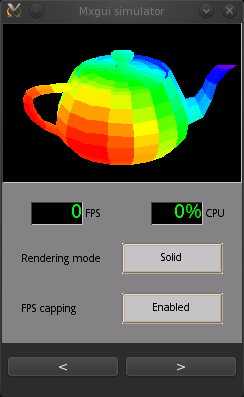
The Mxgui simulator, running one of the demos