Windows Netbeans configuration
Installing the IDE
Download the Netbeans IDE. Among the possible versions choose the C/C++ version. Netbeans is an IDE written in Java, so it requires the JDK to function. If you don't have the JDK installed, download it from here and install it before installing Netbeans.
Configuring the IDE
Netbeans is a generic C/C++ IDE, and once installed is not set up by default to develop for ARM microcontrollers and Miosix. So you need to configure it. This is a one-time step that you will have to do again only if you re-install the IDE.
Note: this assumes you have already installed the Miosix toolchain, if not read the Windows Quick Start tutorial first.
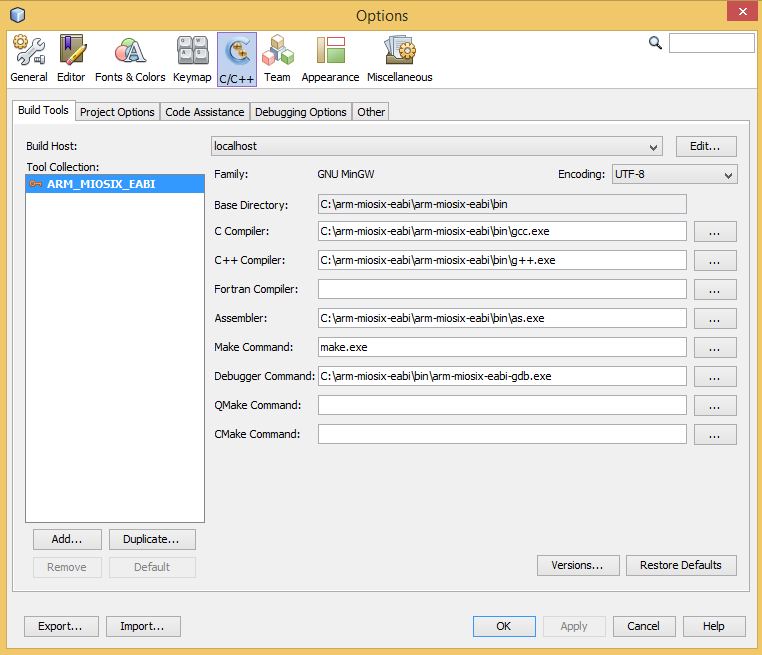
Open the Netbeans IDE (there should be an icon on the Desktop after installation) and click on "Tools > Options". From the top of the options window select the C/C++ panel, and click the "Add" button to add a compiler to Netbeans. As "Base directory" choose "C:\arm-miosix-eabi\arm-miosix-eabi\bin". Choose "GNU MinGW" as "Tool collection family", and "ARM_MIOSIX_EABI" as "Tool collection name". Note that you must use the "ARM_MIOSIX_EABI" name, or you'll have problems later. The C and C++ compiler should be automatically filled in by Netbeans, if not copy them from the screenshot below.
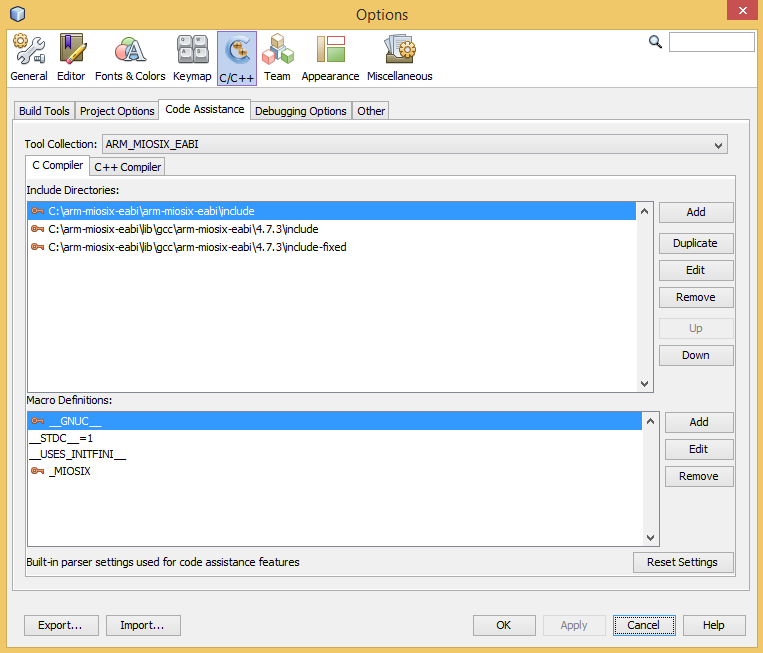
Last, you will need to set up the paths with the compiler libraries for code completion to work. Click on the "Code assistance" tab, and "C compiler" sub-tab. The list of folders and macro definitions should look like in this screenshot, if not, add the paths manually.
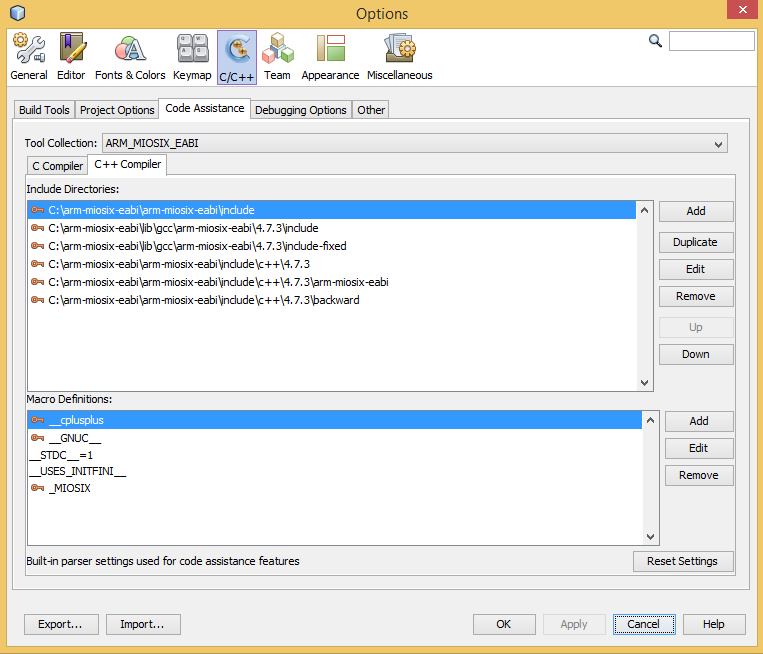
Then click th "C++ compiler" sub-tab and check if the paths and macro definitions are correct. If not add the missing paths manually as in the next screenshot.


